Canva Whiteboards and Family History Storytelling
Interactive links make Canva whiteboards an incredibly flexible canvas for sharing family history stories.
Note: This article was originally published on May 12, 2023. It references some feature/functionality of the Ponga.com platform that is no longer available.
I was a co-founder of the now offline platform Ponga.com. We wanted to build a way to capture the stories in old family photos. Though Ponga is no longer available, our Projectkin community has created new ways to turn those stories into engaging, interactive experiences using a variety of materials and software platforms. A standout among those platforms is Canva’s whiteboard feature. We’ve found it so flexible that we’ve used it in several project recipes. This article describes why and highlights key features that can be integrated into other family history projects.
How it's different
Canva whiteboard, introduced in late 2022, mimics a digital whiteboard where any number of photos, design elements, and/or embedded media, can be placed on an infinitely large canvas that mimics a whiteboard. That whiteboard could be downloaded as a PDF or JPEG like any other Canva design element, but it can also be shared as a link where viewers can engage directly with individual elements on the whiteboard. When shared as a link, a Canva whiteboard becomes an infinitely flexible web page. As a page, it’s hosted at Canva but can be shared and embedded much as any other web page.
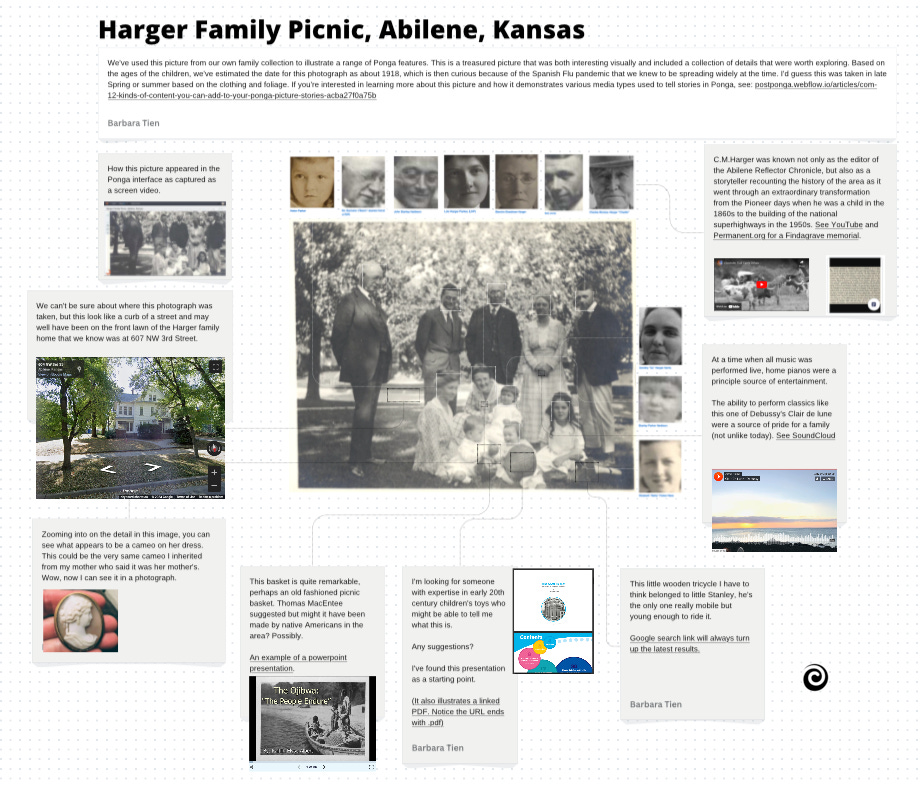
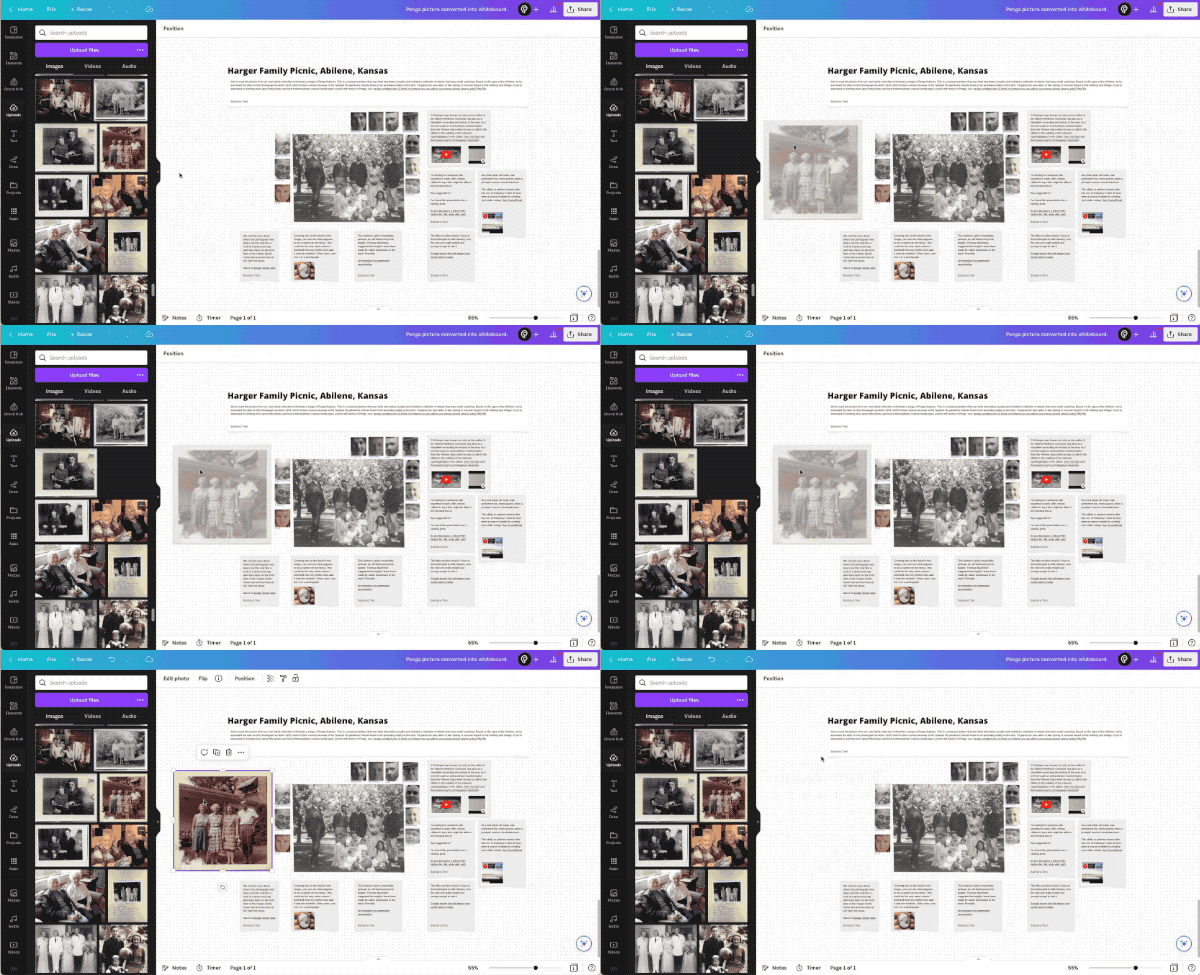
Canva does not support the unique “pop-up” or previewing of content in selections as Ponga did. However, it does support embedded links and an almost infinite flexibility to add material around your picture. As you'll see in the animated example, this parallels the Ponga experience in many ways.
As you might expect, the core use case for whiteboards is in online and hybrid meetings where physical whiteboards might otherwise have been used. In modern business environments, this creates a way to maintain persistent whiteboards teams can take with them and discuss after a meeting concludes.
Whiteboards in Family History
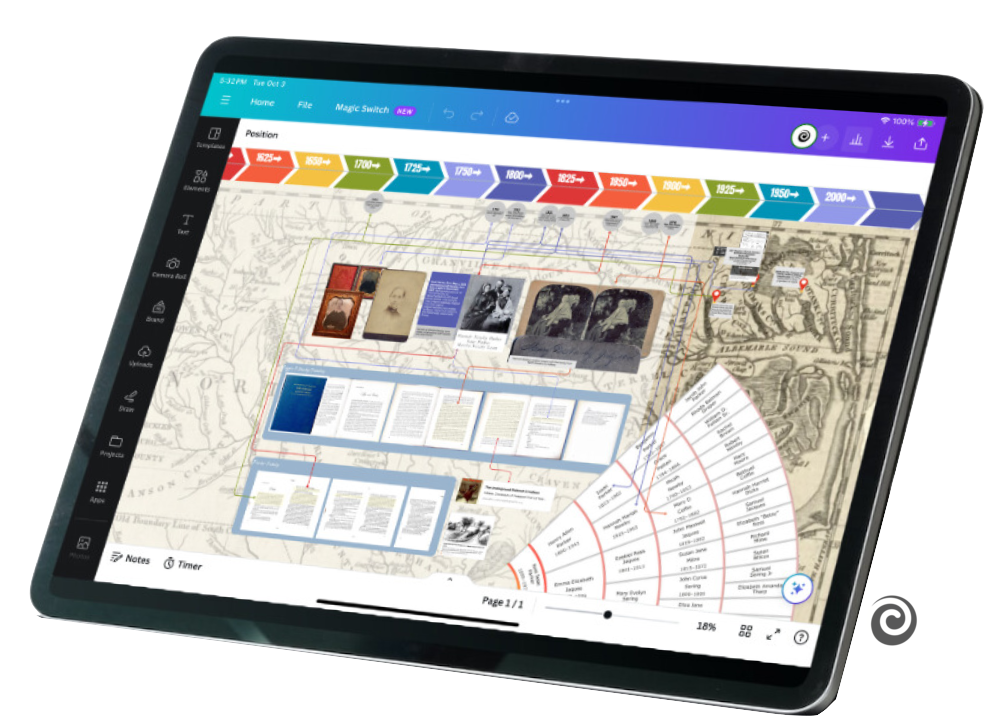
In family history use cases, these fancy digital whiteboards have a related, if different application. Whiteboards can be used like traditional corkboards to visually arrange information so that it can be examined in a visual context. A family tree is the most natural case. It also applies to timelines of infinite length where you're continually adding details and want to share them with other family members. It also allows for annotations as simple comments or rich graphic additions.
Canva includes an array of graphic elements like lines, rectangles, and text that can be placed on top to visually interconnect the elements. Also, any element can include links that take your viewer anywhere on the Internet. Some media on the internet like PDF documents and videos, support embedding so media "plays" without a user leaving the whiteboard.
The core features of Canva whiteboards will seem very familiar to long-time Ponga users. With thoughtful planning, they can be used as a reasonable alternative for family history use cases.
Unlike Ponga, Canva doesn't… implement the kinds of facial organization features. As an alternative, I'd recommend exploring specialized applications like ACDSee, Adobe Lightroom, ImageRanger or dozens of others, then using Metadata to tag faces to images. Canva also doesn't display or modify image metadata. I recommend you organize your images first as part of an intake workflow, then bring them into Canva Whiteboards. (See our Tutorial Tuesday on Metadata with Caroline Guntur.)
I'd also recommend archiving your images separately from Canva using specialized local and/or cloud storage platforms like WeAre.xyz, Permanent.org, Forever.com, or others. See the recording of our talk on Archiving that was part of the 5 Essential Elements series of family history projects to learn more.
Using Canva Whiteboards
If you’ve used Canva for graphic design projects, you'll find the interface to be very familiar. It operates in a web browser so there's nothing to download. Every picture or graphic element you add to any design in Canva is added to your Canva uploads so it's easy to pull in things you've used elsewhere. It's also convenient to draw from templates and materials developed by others.
To bring your pictures into Canva, just drag them into the interface. Canva now offers apps to interconnect directly with major cloud storage providers like Dropbox, Google Drive, and Google Photos. If you've moved your Ponga archive into one of these services, that can be a great way to bring them into Canva. Learn more here.
I like to take full advantage of the infinitely large whiteboard feature so I generally plan to create one picture or story per whiteboard, but there's also no reason you can't get creative and use one whiteboard for a multiple pictures, a collage, or other kind of story. Using whiteboards is a little like digital scrapbooking in that you’ll want to be mindful of telling a visual story.
Also note that as you upload your own images to Canva, you must manually drag images onto a canvas-like space to create whiteboards. None are created automatically for you from uploads. Take a look at the Project Recipe event in September 2023, "A Map, Timeline & Story Viewed: Two Ways" in the Projectkin Event Archives.
Embeds and Links
Canva supports adding content as either embeds or links. In Canva's digital whiteboard model, embeds don't “pop-up” as they did in Ponga, and are instead arrayed around the whiteboard such that they can be directly engaged with by anyone with the link to the whiteboard. See the whiteboard example that is itself embedded into this web page below.
To take advantage of embedding, tap "/" to bring up a magic menu and enter "embed" then paste your link. After a moment to search for your link, Canva will present a preview of the remote site. Links to sites like YouTube embed directly so that they are playable in the interface. Documents in PDF form from institutional sites like museums or the Library of Congress are immediately accessible without leaving Canva. If you have a PDF file, add the document into cloud storage on sites like Google Drive, or Dropbox, and then copy and paste the share link.
Tip: Less is Often More
While it can be tempting to go a little crazy tossing in all kinds of content, “less” is usually “more.” I recommend starting with a focus on your end goal. If you're using a family history whiteboard to simply park ideas, then that's fine, go crazy. If you're using it to communicate, then keep the larger picture in mind and consider how others might "read" your visual result. It’s free and easy to create a new or copy an existing whiteboard.
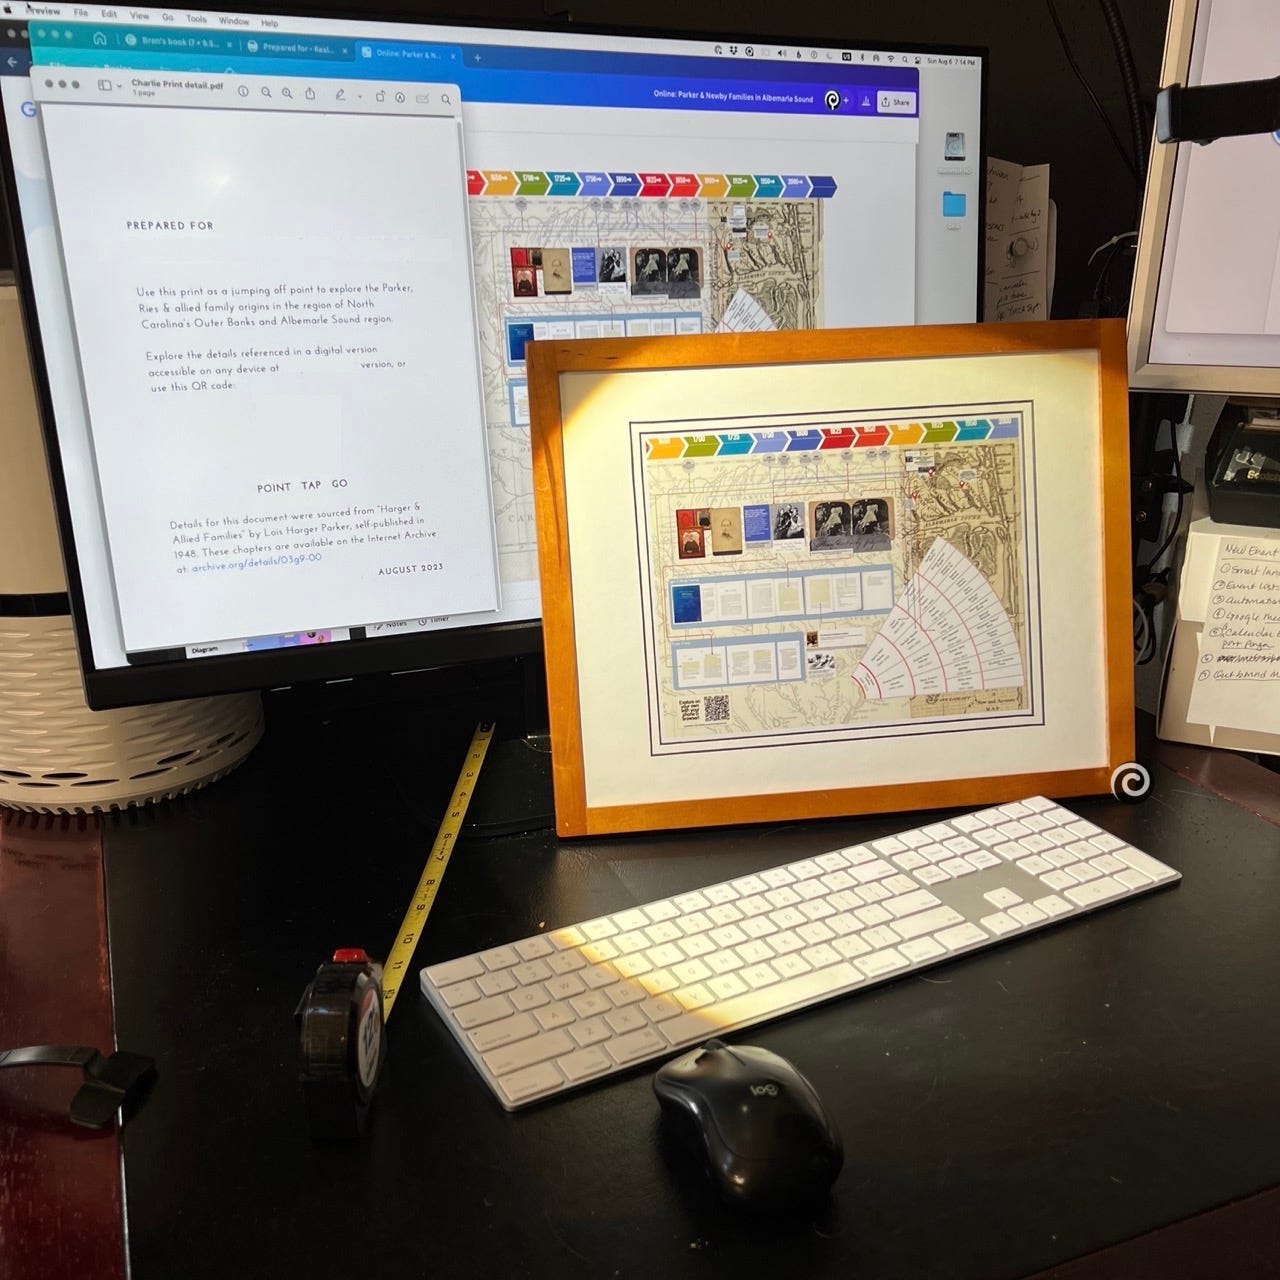
I often find that I start with something of a collection of facts that looks more like a detective’s yarn map. Once the narrative is clear, I slowly winnow it into a visual story. In the September 2023, "A Map, Timeline & Story Viewed: Two Ways" example, the final printed picture was the result of some significant edits. The good news is that editing is easy.
Sharing: Flexible, but Less Private
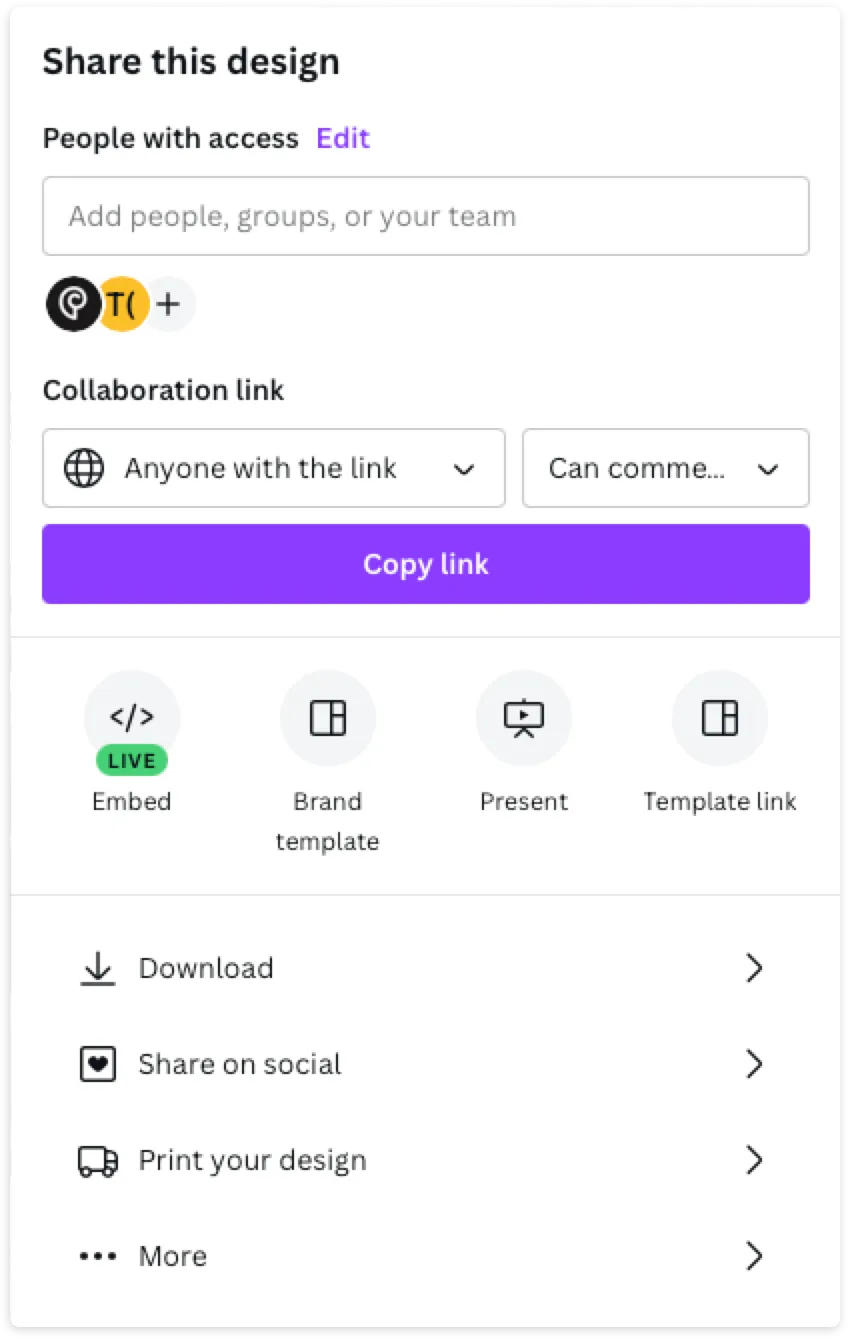
Canva whiteboards benefit from the range of ways in which any Canva digital object can be shared and reused. This includes the graphics and image file formats Canva is famous for as well as PDF documents and digital embeds like video. Any canva whiteboard can be shared as a link with settings for view-only, can comments. Here’s can-comment link to the first example. This link allows anyone with the link to add comments.
This flexibility means that you can also download and convert a whiteboard you created or one shared with you into other formats from the Canva download menu. While that's useful, that also means that sharing is not private.
In Canva, there's no means to share a picture that does not give your guests a way to make your whiteboard their own. Our "Two Ways" example used Canva to complement a printed version of the collage. The link was only shared as a QR code with the expectation that it would be viewed and interacted with on a phone or tablet. It was shared in a home and only with family members. Another “Two Ways” project was shared as a recipe on November 1st. Projectkin members can explore that recording and the project recipe here.
To learn more about the Projectkin community, our free tutorials, and special events, visit projectkin.org.


